Preserving Files During OTA
This guide explains how to preserve specific files and directories during an OTA update by using ota_backup_files_list.txt.
Prerequisites
- Virtual Media
- OTA ISO image
Step 1: Create ota_backup_files_list.txt
Create ota_backup_files_list.txt under /ota. In this file, list the absolute path of each file or directory that must be preserved across the OTA update (one path per line).
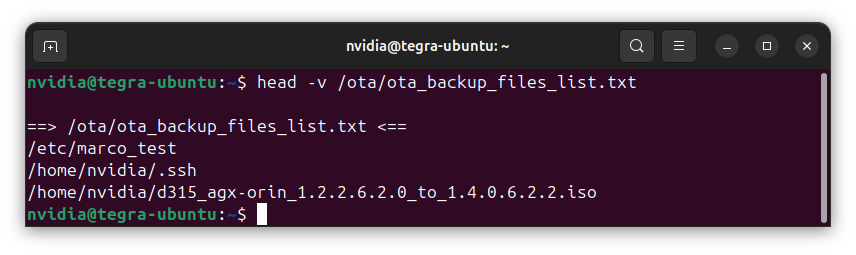
Figure 1. Example content of ota_backup_files_list.txt.
Step 2: Run OTA using Virtual Media
After ota_backup_files_list.txt is prepared, start the OTA update through Virtual Media.
For the Redfish virtual media API and step-by-step usage (including InsertMedia), see Virtual Media.
During the OTA update, the system checks for ota_backup_files_list.txt under /ota.
A detection message is shown only when the file is found.
The OTA log is available at /var/log/ermidaemon/ermi_vminstall.log.
If the file is present, the listed absolute paths are used to determine which files and directories are preserved.
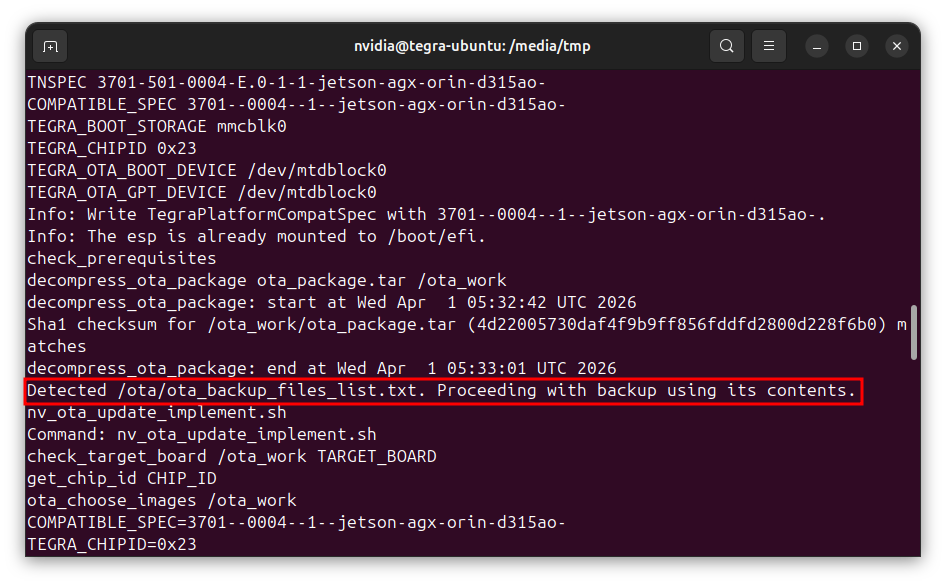
Figure 2. Example OTA log: backup list detected.
Step 3: Monitor OTA and Verify Preservation
During OTA via Virtual Media, the device may reboot, update partitions, and switch to the updated partition set. Use Serial over LAN (SOL) during this phase to monitor progress, then verify the preservation result in the OTA logs.
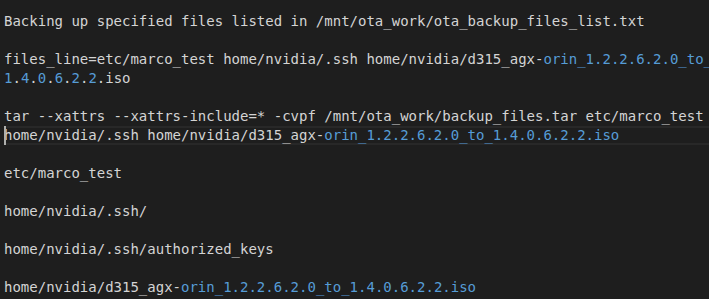
Figure 3. Example log output for a successful preservation result.

Figure 4. Example log output for a failed preservation result.
Note
ota_backup_files_list.txtmust be placed under/otaand must contain absolute paths (one per line).- The OTA process applies this backup list only when it detects
ota_backup_files_list.txtduring the update.